Wednesday, December 10, 2014

The Curious Cabinet of Dr. Hart


If we're gonna cook and bake and make tea, we're gonna need some kitchen cabinets.

We're using the room adjoining the downstairs kitchen as our prep room / pantry. The kitchen proper has the stainless range, fridge, and freezer, while the pantry will have wooden cabinets and a butcher block countertop. I suspect we'll spend as much time in the pantry as in the kitchen. Kneading and rolling out dough, squeezing lemons, adding eye of newt, etc. before transporting everything to the oven or stove.

There's not a lot of room here, but we're able to make a nice L-shaped workspace. By regulation, we have to have sink in here for cleaning vegetables and washing our hands. Heaven forbid that we wash carrots in the same sink (sorry: three sinks) that we use to wash dishes. Nope, that requires a separate sink.

I assembled and installed the base cabinets last week; the countertops come next week. Before that, however, we had to move some of the plumbing and electrical because -- of course -- they weren't in the right place. The hot and cold water pipes were on opposite sides of the same stud, virtually guaranteeing that one or the other would be in the wrong position. Naturally, the edge of the sink cabinet fell exactly in between the two. So out comes some of the wall and in comes the plumber to move the hot water pipe a whole 12 inches to one side. We nudged the drain pipe over a bit, too, just for convenience.

And as long as we've got the wall open...

I took the opportunity to add a line of new grounded electrical outlets above the base cabinets. We'll need them for mixers, blender, counter-rotating knives, or whatever. There's a GFCI under the sink, just in case. And even a 220V outlet because, well, why not?

Because this is an outside wall, I insulated it a few years ago when we were doing so much work on the floor above. Seemed like a good idea, but now I had to remove some of that insulation to rearrange the plumbing and electrical, and then try to put it all back. Net result: a lot of foam debris and dust all over the pantry. That stuff's hard to sweep up.


Sunday, November 2, 2014

Twenty Days In the Cooler!


Ever heard of a California Cooler?

No, it's not a wine drink. Or a type of Styrofoam chest. A California Cooler was an early kitchen appliance, the predecessor to the refrigerator. If you lived near the ocean around the turn of the century you kept your meat, cheese, and eggs in the California Cooler. And this house had one.

The principle is pretty simple. The cooler was basically a tall, narrow closet built on an exterior wall. The top and bottom of the closet vented to the outside through small holes in the wall. The idea was that cool sea breezes (of which we have an abundance) would blow in through the vents, forcing air to circulate through the inside of the closet. By making the box tall and narrow, like a broom closet, you could encourage the relatively warm air to rise out of the top, pulling more cool air in at the bottom.

It probably wasn't great, but it beats leaving food out on the counter to spoil.

At any rate, we found the telltale vents on the outside of the house when it was being painted. We'd already suspected they'd be there, since we'd spotted what looked like the insides of the vent holes when the kitchen was remodeled back in 2011. Finding the outside vents confirmed it.

One of the vents got covered up long ago, but the other was still exposed to the outside. At some point, somebody nailed a piece of metal over the hole in a halfhearted attempt to seal it, as you can see here. It's not very weatherproof, and now that the rainy season is upon us, it was time to permanently close off the last of the old vent.

We shrewdly kept some spare cedar shingles when the house was repainted, and one of them was pressed into service today. After a bit of cutting and trimming, the replacement shingle fits neatly over the rectangular hole left by the cooler. After a few coats of primer and paint, it pretty much disappears amidst all the other shingles. Mission accomplished. Time for a cold drink.


Out of the Closet


And lo, on the 1,675th day* there was, upon the land of the Hart Mansion, a new closet. And it was good.

Well, good-ish. You see, there's a small space in between the two downstairs restrooms. It's kind of like a hallway, but smaller. More of a passage. Or a wide spot between the walls. You take one or two steps into this "hallway" before turning left for the men's room or right for the ladies' room, but that's about it. Forgettable, in other words.

Which is fine, except that it's also fairly deep, with very high ceilings, and all that space is wasted. And we don't have a lot of space to waste in our 1890s-era kitchen. So Kathy had the bright idea of putting a storage closet in there. Nothing fancy; just something that could sit against the back wall and make it useful.

Trouble is, none of the standard home-store closets fit in the space. Of course. We would've been happy with generic knock-together storage units, but they were all either too wide to fit or so small that they wasted most of the space.

So we built our own out of the same type of white melamine-laminated particleboard that flat-packed ones use. So we've got that whole cheap Swedish look going.

It took a few days, but now we've got a custom-built cabinet that perfectly fits the space. It's secured directly to the walls, not free standing, so it's solidly in place. The sides, top, and shelves are melamine, and the kick space down by the floor encloses the heating vent we added last year.

The doors are pine with bead board inserts. I detailed the doors a bit using the router, just like the doors up in the third-floor bathroom. Some day, future inhabitants may remark on how nice it is that the doors all match. In reality, those are the only router bits I have, so yeah, they're all going to look pretty much the same.

*True. That's the number of days since we first moved in.

Thursday, October 30, 2014

A Flower Grows in Brickland


So this happened.

We had a little sprinkle of rain the other day, and the next time Kathy and I went outside she said, "Where did THAT come from?"

No idea. This little guy popped up all on his own. We don't have any other flowers like it in the yard -- actually, we have no flowers at all -- and none of our neighbors seem to have one of these, either.

It's just a nice little surprise. Or Nature's way of telling us it's past time to plant something around here.

Wednesday, October 22, 2014

Modern Drunkard


We're getting official!

Kathy and I applied for our beer-and-wine license from the ABC (California Department of Alcoholic Beverage Control). There are a number of hoops you have to jump through, including having yourself fingerprinted. And you have to read a bunch of rules about hiring minors, serving kids, and avoiding "table surfing."

Did you know that there are more than 45 different kinds of liquor licenses? I figured there were just two: a full liquor license and a beer/wine license. Nope. Turns out it makes a difference (to the ABC, at least) if you're a permanent restaurant, if you're a food truck, if you're serving at a special event, if you're located in a high-crime area, if you're on a boat, if you allow dancing, and more.

If anyone asks, we're getting a Type 41 license. That allows us to serve beer, wine, champagne, sherry, and other non-distilled spirits so long as it's always served with meals. (And "meal" has its own definition for licensing purposes. A basket of peanuts doesn't count.) Total sales of alcoholic beverages cannot exceed 50% of our revenue. Otherwise, we'd be a bar and that's a different license.

Did you know that alcoholic drinks are (supposed to be) served in different glasses than nonalcoholic drinks? That's so servers, waiters, and peace officers can tell at a glance who's quaffing booze and who isn't.

Plainclothes ABC officers are allowed to show up unannounced and prowl through our kitchen. They're allowed to arrest us (or anyone else) for violations of the licensing terms. And we have to buy our stock from an officially licensed alcohol wholesaler, not a retailer. No Costco or BevMo runs.

As part of the process we have to post this lovely poster in our front window for exactly 30 days. We also have to mail a form letter to everyone within 500 feet of the house, informing them of our intent to sell alcoholic beverages on the premises. They have 30 days to lodge a formal complaint if they want to, although we don't expect any trouble. And if anyone does complain, well, we just won't serve them any drinks.


Paint, Counter-Paint


We're back to painting. Upstairs, Kathy is painting her office/study. Downstairs, Jim is working on the trim around the downstairs bathrooms.

Kathy's space has always been baby blue, but the long-term plan was to paint it light brown. After almost five years, we finally got around to it. Here is the darker of the two brown colors going on under the "witch's cap" on the top floor.

Meanwhile, down in the commercial kitchen, we also wanted to paint the small space in between the two public restrooms. The walls there had seen a lot of damage, first when the DPO (damned previous owner) added electrical conduit all over the walls, and again when we removed it. There was a lot of patching and filling going on, mostly with plaster of paris over the old original lath-and-plaster. The repairs left of lot of irregular unpainted areas. But nothing a can of paint can't fix.

That part was easy enough -- so easy, Kathy let me paint it by myself. But you know how one thing leads to another...?

The trim around the doorway here was always kind of second-rate. It was simple four-inch molding, not the nicely detailed stuff that's in most of the other parts of the house. It was okay, but not great. I remember last year I'd spent a lot of time sanding it smooth and caulking around the edges, thinking someday I'd paint it. Now that it's paint time, I wasn't so sure.

At first, my cunning plan was to use the router to cut some shallow grooves in the trim to make it look nicer. But that would mean cobbling together some straightedges along the wall to guide the router. That's a lot of work, plus it'll make holes in the wall I just painted. Better to take the trim down and work it on the router table. And as long as I'm removing the trim...

You remember when we redecorated the men's room we took down the original molding from that doorway (above)? The DPO had cut it down to a smaller size, and it was all covered in faded, dirty wine labels. We tossed that trim into the back of garage. Hey, I wonder if I can reuse that stuff...

My friend Jasco and I spent two solid days stripping wine labels and layers of paint. After about six applications, some of the original wood started to show through. There's no way it was going to be clean enough to stain, but at least we could remove some of the accumulated paint.

For the record, I counted four different paint colors in about six layers. There was a dark yellowish brown, dark battleship gray/blue on top of that, and two versions of white on top of that. The wine labels were applied over the most recent layer of white paint.


But the trim had been butchered, ripped down both sides to make it narrower to fit in the bathroom. One of the decorative rosettes had been cut almost in half. To restore it, I got some redwood pieces left over from another project and cut them to size. With a little practice and a variety of router bits, I managed to recreate the missing part of the trim profile and glued it onto the edges of the original molding. Some sandpaper and wood filler took care of the gaps.  I left a couple of the old nail holes unfilled so that it wouldn't look over-restored.

Now that it's primed it doesn't look too bad, if I do say so. The edges of this trim are all new. Ironically, I put the primer on thick so it wouldn't look like new paint over new wood. I'm hoping the gloppiness will help make it look older, like the rest of the trim.


Thursday, September 4, 2014

All Our Ducts In a Row


We have a fan base! Or at least, a working fan.

Once the old kitchen fan was degreased, it was time for the fun part: reinstalling it. This thing mounts to the outside of the house, sucking air out of the kitchen and blowing it into the atmosphere. That's all great, but the machinery weighs about 40 lbs. and needs to be mounted up overhead, outside the kitchen wall. Easier said than done.

Originally, the unit was mounted on stilts about 8 feet tall. That worked fine, but the heavy wooden supports completely obstructed the kitchen window. Who wants to look at the legs holding up the vent fan? So I tore all that down and resolved to suspend the fan from above instead of propping it up from below. Again, easier said than done.

The toughest part was simply lifting the stupid thing up into position. I tried hoisting it up with ropes, but after many scrapes, tumbles, and close calls I never even got it halfway. Kathy and I were able to work together and muscle it up. Once we got it over our heads and more or less in position, we tied it off with ropes. So the think dangled in midair for a few days.

The trick then was to build permanent supports around it while keeping it hanging in place. As the support structure went together, I could gradually loosen, and finally remove, all the ropes. Before long, the fan mechanism was firmly mounted to the underside of our back deck -- almost as if we'd planned it!

Actually, we had. Our original deck had been red-tagged even before we moved in, and had to be demolished. When the new deck went in, we were careful to make sure it left a fan-sized hole right outside the kitchen. To be honest, I wasn't entirely sure we'd planned it right (or that the builders had constructed it right), and that caused some sleepless nights. What if the fan won't go back in place? What do we do then?

But it fit just fine. Not a single beam or brace was in the way. Now the fan mechanism is back in its accustomed spot, but held from above instead of from below.

The second problem was routing the exhaust vent. Sucking air out of the kitchen is only half of the equation. Where does it go after that? The health department and fire codes have strict regulations about that. The exhaust vent has to be a certain distance from the house, it can't blow towards flammable materials, etc. We didn't have a lot of options.

The old vent was J-shaped and pretty badly deteriorated after all those years out in the weather. We had a new duct fabricated and I installed it just a few days ago. A couple of coats of house paint help it look a little less conspicuous.

Oh, and then there's the electrical hookup. The fan is operated from a switch next to the stove, but those wires were cut off long ago when the deck was rebuilt. Rerouting and reconnecting the wires presented its own complications, but that eventually sorted itself out.

Fan mounted. Electrical connected. New duct installed. Everything degreased. Let's test it. Throw the switch, Igor. Hooray, it works. The hood fan drones away and sucks so much air out that it pulls the kitchen door open. Success.

So we're in business, right? Not to fast. We need official sign-off from the Fire Department.

As the fire marshal watches, the fire-suppression installers again tie balloons over all the nozzles and pull the big red handle. POOF! The CO2 cartridge blows and all the balloons inflate. Pop! Pop! Pop! They overfill and bright little scraps of balloon flutter down all over the stove. Smiles all around.

As proof that we've officially passed inspection, we get a tag tied to the handle. I feel like we won the blue ribbon at the state fair.

Tuesday, August 12, 2014

What Cannot Be Un-Seen


May the grease of a thousand meals infest your vent fan -- ancient restaurateur's curse

One word: yuck.

After sitting outside in pieces for almost four years, it was time to reinstall the kitchen vent fan. This is the thing that sucks kitchen fumes out of the commercial kitchen, like an industrial-sized version of your average hood vent.

Except that the duct is 14 inches in diameter, the fan is the size of a fifth-grader, and the motor that drives it has more horsepower than my first car. The whole thing weighs about 40 pounds, and that's not counting the grease.

The grease . Oh, the grease.

Neither the fan nor any of the ductwork had been cleaned in at least ten years, which is sort of okay, because it hadn't been used in the last six. But imagine a full-service restaurant, cooking steaks and chops and fish and chicken and who-knows-what, every evening, night after night, for years. Imagine what goes up the hood vent in all that time. And imagine where it stays.

Now imagine cleaning it. I did, but the reality was still a surprise. Old grease gets really hard and black and sticky. It laughs at Dawn and normal household cleaners. So Kathy and I went to the local restaurant-supply place and got a gallon of the good stuff. At first, we picked up a big bottle labeled stove and oven cleaner, but the owner of the store said, "Oh, no. THIS is what you want," and pointed to a different bottle. "Use gloves. And a mask."

Okay then... we're talking industrial-strength cleaner.

Even so, the grease put up a valiant fight. You pour the solvent on full-strength (no dilution) and let it sit for 20-30 minutes. The grease starts to bubble a little bit. That's how you know you don't want to touch it. Then you scrape the resulting goo off and... uh, where am I supposed to put this stuff?

Fun fact: The brush I was using to spread solvent now has no bristles. They got shorter and shorter as I worked, and now they're just... gone.

This is sort of like stripping paint, but with a worse smell. Like paint stripper, the grease solvent doesn't really make the old grease dissolve and liquefy, it just makes it sticky and gooey and marginally easier to scrape off. It turns old grease into the consistency of honey, because of course honey is so easy to remove, right?

And it makes a big, sticky, biodegradable mess. I worked over a tarp in the backyard, which (in hindsight) added the complication of blowing sand. Cleaning sand out of the honey-coated machinery made it a perfect day.

I've burned through the entire gallon of solvent and barely managed to clean everything once. The fan turns freely now, and without throwing off chunks of beef fat. I had to rebuild the AC motor, but that wasn't terrible. Now I need a fan belt to connect the motor to the fan, because the old one was rotted. I figure any ol' belt will do, so I'll see what's on sale down at the auto parts store. I hope they'll let me in.


Wednesday, August 6, 2014

Fight the Supression!


Raise your fist and yell, brother! We're being suppressed!

Oh, wait, no. This is actually a good thing. The fire-suppression system in the commercial kitchen was not up to modern standards. Nope. In fact, when I called the first expert to come out and look at it, he said he'd never seen one like this before. "Maybe my boss has seen one of these, but I dunno..."

Not words that inspire confidence.

Still, we weren't eager to buy a new fire system just for the fun of it, so we got a second opinion from the fire department, but they also shook their heads. That's a definite no, then.

Got three quotes from installers, picked the middle one, and got started. The old fire system had to come out first, which took a day and a half, and the new one went in, which took only half a day. The installer told me that he was frankly scared of removing the old system. Seems the big extinguisher bottle was on a hair trigger, and he was afraid that shaking it or tampering with the hardware would set it off, flooding the kitchen (and his face) with cold fire-extinguisher spray. He was happy to finally get it down off the wall, out of the house, and safely into his truck.

To me, the new system looks like a shinier version of the old system, but I'm not an expert. The law says that commercial food-preparation facilities must have a metal hood vent that extends a certain distance beyond the cooking surface(s). We had cleverly purchased our range to fit under the hood, thus complying with the regulations. But you also need a certain number of extinguisher nozzles pointed down onto the cooktop (so many per burner), and more nozzles pointed up into the vent hood, in case the fire goes up the chimney. The old fire-suppression system failed on both counts.

You trigger the system by pulling the big red handle mounted on the wall. The rules say the handle must be more than 6 feet away from the cooktop, but less than than 12 feet away. I think the idea is that you want it far enough away that it's not engulfed in the flames, but not so far away that it's hard to reach. The handle also must be a certain distance from the floor: high enough that kids don't play with it, but low enough that short people can pull it. It's a tricky game.

Pull the handle and -- whoosh! -- the system dumps an entire fire extinguisher bottle all over your cooktop and up the vent. There's no stopping it; it's an all-or-nothing deal, and it costs about $150 to refill and re-arm the system. I suspect that's where the installers make some of their money.

There's also a fusible link up inside the hood vent. If it gets hot enough to melt, it sets off the system without needing to pull the handle.

FYI, the nozzles are typically filled with Vaseline to prevent grease and dust from clogging them up. The red plastic caps then keep the Vaseline from dripping out (and into your food).

After installation, you do what's called "the balloon test." They tie party balloons over all the nozzles, put in a special dummy fire extinguisher bottle, and pull the handle. (They let me pull it.) Whoosh! If all the balloons fill up with compressed gas, you know the system is working. It's kind of festive.

Now we have to demonstrate it in front of the fire department to show them that the system works. So more balloons. Maybe I'll bring party hats.


The Great Wall of PG


You can see it from space!

As proof, I offer this high-altitude photo taken from upstairs. You can clearly see our new retaining wall in the distance, right between Oklahoma and Serbia.

The reddish oil tanker in the foreground gives you an idea of scale. The wall is an amazing four courses high, plus a buried course of foundation stones and the row of cap stones across the top.

After all was said and done, we wound up with eight leftover blocks. The rock store won't take them back, so we need to find something to do with them. We've got four big ones (75 lbs. each) three medium-sized ones (50 lbs. each), and one cap stone (55 lbs.). Anybody want to build a really small wall? Or need boat anchors?

Friday, August 1, 2014

The Smallest Room In the House


It's finally safe to go into the men's room.

After almost a year of on-again, off-again remodeling, the downstairs men's room (the one right off the commercial kitchen) is completely* finished. From the nasty, claustrophobic, little den that it was, it's now a bright, inviting... uh, men's room.

If you recall, we couldn't decide whether to save the wine-label "wallpaper" that was covering the entire room from top to bottom. In the end, we removed some of it and covered the rest. So the wine labels are still in there somewhere; they're just not on display anymore. We resurfaced all four walls (and the ceiling) with fresh new water-resistant drywall. The plumbing got pulled out and updated, both in the walls and under the floor; the electrical conduit got removed and the wires hidden appropriately; the oak floor got refinished; the ventilation fan got replaced; the ceiling light got swapped out; and all-new porcelain fixtures went in. In short, it's an all-new room in the same place as the old room.

Kathy went to work on the painting, adding almost as many colors as on the outside of the house. The bead board on the lower half is gloss black, the upper half of the walls is gray, and she hand-painted a series of horizontal black, red, and gray stripes around the top of the walls to visually lower the ceiling a bit. The room is actually higher than it is wide, so making it appear shorter is a good thing.

We found the tiniest sink we could fit into the corner, with an equally small faucet. The door still swings into the room and wants to hit the sink, so we mounted a permanent doorstop on the floor to prevent customers from inadvertently smashing the sink. I've still got to come up with some kind of lock for the door; the existing vintage lock mechanism might be confusing for people to operate.

We kicked around a lot of ideas for decorating the room. What colors do we want? What kind of decorations? Should we hang pictures, display old pieces of hardware, or leave the walls bare? In the end, Kathy found a group of vintage racing car photos that we framed and hung on each wall. They're big and oversized, and look great. I'm a fan. And the black/white photos, gray paint, red stripes, and black molding all look good against the stained hardwood floor. Our first public restroom is open for business!


*Well, almost. We need to add a small shelf to hold the hand soap and some paper towels. I give it another year.

Monday, July 14, 2014

Paging Mr. Hadrian...


As wall building goes, we're not professionals. But we do okay.

After stacking all the various sizes and shapes of blocks in neat piles, we set about actually laying the foundation. One entire course of stones will get buried, and these have to be absolutely flat and level, because anything we stack on top of them ain't moving. So we exercised our best high school geometry to draw out the lines and curves we wanted.

As I mentioned earlier, most of the digging is way underground. Not just because the bottom course of blocks gets buried, but because our ground level is already too high and we want to lower it by a good foot or two. That means digging deep trenches before even the first blocks can go in. I was waist-deep most of the time, and tossing soil onto piles that were over my head. Thankfully, it's been warm and sunny all this week, because otherwise we might have been comfortable.

Once we got down to about the level we wanted, it was a matter of carefully putting some of the soil back in to level it. Every block has to be level front-to-back and side-to-side, but it also has to be at the right height and the exact same height as all its neighbors. Basically, the first block you set determines he position of all the others.

We'd dig out a bit, lay a few foundation stones, tweak them until they're straight and level, and then take a break. Then more digging, more levelling, more stones. We got the bottom course done in about three days.

The hardest part was laying the two curves because, well, they're not straight. But the stones are. To do an "outside" (convex) curve, you cut away part of the back of each stone to make it a trapezoid. That way, the fronts all fit together snugly while the backs are smaller than the fronts. Cue the angle grinder and diamond-tipped saw. Doing "inside" (concave) curves is easy in comparison. You just angle the blocks with their faces touching.

Once you've got the foundation course laid, building up the actual wall is relatively easy and kind of fun. You can place the differently sized blocks any way you like, but there are also suggested patterns that give a random look without funny-looking repeats or ugly gaps.

As of today, we're maybe three-quarters of the way done. The entire foundation course is laid, and about half of the wall. We've actually run out of blocks; we'll need to order a few dozen more. I can't wait to haul them in from the street.

The Stones Come to Pacific Grove


Please allow me to introduce myself. I'm a man who delivers rocks.

Our nifty little retaining wall will be made up of cast "stone" blocks that interlock together like really big LEGO bricks. You can find these in all different types, colors, and sizes, and we eventually settled on the style we liked. They had to be special-ordered (who would keep these in stock?), but that only took about a week.

Kathy and I made bets on how much the blocks would cost. My guess was lower; hers was higher. We were both wrong. It actually cost less than half of my low estimate. Bonus!

On the other hand, we were way off on the weight, and this proved to be punishing. They'll deliver the rock to the curb, but not onto the property. That's your responsibility.

I have to hand it to the driver/forklift operator, though. That guy is an artist with heavy equipment. He parked his huge truck in the middle of our street, casually blocking all the traffic, then unloaded his forklift off the back and proceeded to whirl it around like he was a circus performer on a unicycle. The entire load of blocks was on the ground in under five minutes, including lining them up nice and neat on the sidewalk. He could probably rearrange eggs in a carton with that thing.

Once he was gone we really missed him, because now we had to get all those same blocks into the backyard by ourselves. And quickly, too, since they were blocking the driveway. And it's uphill...

The invoice told us we'd just taken delivery of 7284 pounds of blocks. That's 3.5 freakin' tons! The largest and heaviest blocks weigh 75 pounds apiece; even the smallest ones come in at 18 lbs. Kathy would load three or four of these into the wheelbarrow and push them up the ramp to the backyard. I'd take a pair of the big ones on a hand truck. Over and over, rinse, repeat. If we'd been smart, we would've hired a couple of guys from the Home Depot parking lot.

By the time we finished we'd dead-lifted a total of 7 tons because, of course, you have to lift each stone at least twice: once to get it off the pallet and onto the wheelbarrow, and again out of the wheelbarrow onto the ground. That doesn't even count the work involved in humping it all up the ramp to the backyard. We figured we'd earned ourselves a greasy burger from the joint down the street.

If you need us, we'll be in the Home Depot parking lot.


Digging Dinosaurs


Poor little... whatever type of dinosaur this is. He's put up with a lot, including losing his companion to alien abduction. Now he's up to his neck in displaced dirt. That's one of the few places we could pile it without getting in our own way. We left his head out, though. There's only so much indignity a plaster dinosaur can tolerate.

Trench Warfare II


New project: Let's build a stone retaining wall in the backyard! How hard can it be?

In terms of engineering, it's pretty straightforward. But the labor involved? That's another matter.

We decided that the best way to deal with our sloping backyard was to terrace it. The neighbor's soil is at least a foot higher than ours, putting pressure on the fence. And the whole yard slopes, making it hard to walk on or enjoy. So we decided to push some of the dirt back toward the fence, and pull some of it forward. The result, we hope, will be two more-or-less flat areas with a retaining wall between them.

We started by laying out the now-familiar pile of bricks where we wanted the wall to go. You can see them here. The idea is to run part of the new wall straight, then transition into a semicircular curved section on the left side. That way we get a bit more "high" area to stash the excess dirt.

Then we used some boards to mark out the straight portions and to hold back the dirt once we started digging. And there's going to be a lot of digging.

We figure the retaining wall only needs to be about 2 feet high, but that's just the part you can see. We also need to bury part of the wall, for strength, making the whole thing about 32 inches from top to bottom.

Best of all, most of that 32 inches is going to be underground. The whole idea is to lower our average ground level, so we're going to have to dig out... well, pretty much the entire backyard. Question: Where do you put a backyard's-worth of dirt when you're digging up the backyard? Where does it all go?

In big stinkin' piles, that's where. We had to get clever about piling the dirt someplace where we wouldn't have to immediately turn around and move it again. (This strategy was not 100% successful.) The short-term plan was to shovel dirt from the high parts and throw it into the low parts, knowing full well that we'd have to shovel it back in a few days. but where else can it go? We don't have that much room to work with.

It's a bit like one of those puzzles with 15 tiles that you move around, trying to get them all in order. Except the tiles are big mounds of dirt, and it's hot outside.

Eventually, we did manage to dig a straight(-ish) trench to start the wall. We took the opportunity to bury sprinkler pipe, too, although that was almost more trouble than it was worth. Laying the pipe and putting in risers means keeping certain areas clear (no dirt piles) and it creates trip hazards all over the yard. Just adds to the excitement.

Thursday, June 19, 2014

Game of Thorns


It's springtime, so Kathy and I have started hitting the garden centers.

We started with the sprinkler system... a year ago. Our old drip sprinklers leaked, and we got hit with big water bills every time we turned it on. So we ripped out that old system and dug trenches to install new 3/4-inch PVC sprinkler pipe. Like most projects, we made some progress, stopped for a while, made some more progress, etc.

So far, three sides of the house have new sprinklers. We just need to finish the backyard. That's enough irrigation that we felt safe planting new plants. So, out with the old, in with the new.

We planted purple campanula along the front, hoping that it will drape itself over the front retaining wall. They're kind of small and straggly now, but they should spread out and cover the front planting area before long.

Next to the house we put in a half-dozen gardenias, artfully surrounded by bark dust. Next to them there's one lone begonia, mostly just because I liked it.

Along the side we put in two small hydrangeas and two privets. Our hope is that they'll all grow big and tall and create a barrier between our yard and our neighbor's. Guests staying next door at the B&B have a bad habit of stepping across into our yard, apparently believing we're part of the inn (or because they just don't care). A flower barrier should fix that problem without erecting a big fence.

Finally, we planted two pink jasmine vines on the trellis over our newly built gate. Within a year or so they should grow to cover the entire trellis. We'd thought about climbing roses there, but thorns on a gateway seemed like a bad idea.

It took a good three days before the deer came and ate our flowers. One of the hydrangeas was decapitated, and the orange begonia is missing a lot of its flowers, too. At the same time we bought the flowers we also got a big ol' jug of deer repellant, but of course, we haven't spread it around yet. Good thing we didn't buy bigger plants.

Monday, May 5, 2014

All In All, You're Just Another...


If you've been following our progress at all, you know that Kathy and I love to move bricks back and forth. It's what we do. There's nothing like spending a sunny Sunday afternoon picking up a pair of bricks and moving them 20 feet, before going back for another pair, over and over. We can while away many a happy hour transporting bricks, and often have.


After a few years(!) of this we decided we'd had enough of rearranging piles of bricks and decided to finally build (technically, rebuild) a brick patio out of them. Here it is.

We didn't do it the professional way, of course, but instead worked on it piecemeal as we found time. Once we were certain that all the major plumbing underneath the backyard was solid and reliable, we could start to smooth out the soil and get it level. We eyeballed the dimensions we wanted and made a rough count of the bricks (no problem there). Then we started at one corner, leveling the soil, planting a few bricks, checking with a level, and moving on.

After a few weeks of this we had ourselves a brick patio. The bricks are all dry-set; there's nothing holding them in place except gravity. So we mixed up small batches of concrete and cemented just the outside row of bricks to create a kind of hard ring around the patio that holds everything together.

We're on a bit of a hill, so the backyard slopes a little. That meant we had to design-in some steps, or else slope all the walkways. We chose to put a step into the front (downhill side) of the patio, and we'll probably put a few more steps along the pathways, when we get around to it.

When all the bricks were done and the outside edge was cemented in, we poured polymeric sand into all the gaps. That's special sand mixed with water-activated epoxy. Once you work it into all the cracks, you lightly mist it with water and the sand sets up hard. That should prevent weeds from growing up between all the bricks, and it helps hold the bricks in place. It's not as tough as concrete, but it's more than enough to keep the bricks from shifting around. It's great stuff, but you only have a few minutes to get the water just right. Too little water and it's just dry sand. Too much water and you'll wash away the epoxy and get... dry sand. We went through six 40-lb. buckets of the stuff, so there's exactly 240 pounds of sand in the patio now. And a whole lot of bricks.

Details, Details...


Not every project requires five trips to the hardware store. Most, but not all...

A few weeks ago we finally got around to finishing off a little trim detail we'd been meaning to get to since, oh, about 2011. This post is near the second-floor landing and has some nice scroll work on it, especially near the top. The lower portion, however, is decorated with painted plaster, which was pretty common back in ye olden tymes. The downside is that plaster collects nicks and dings and isn't as durable as wood. The bottom few inches, in particular, had gotten pretty beat up by decades of vacuum cleaners.

So we trimmed out the very bottom, as you can see here. The trim is built up from various pieces of redwood stacked one atop the other, and then all stained and finished as one piece. It matches both the floor and the post pretty well, so it looks like it's always been there. (I considered banging it up a bit to give it a distressed look like everything else, but figured that will happen all on its own. No point in hurrying things.)

Tuesday, April 29, 2014

Ground O'Fence-Ive


Haven't you always wanted the house with the white picket fence around it? Well, we got close. Kind of.

We finally got tired of misguided people trespassing across our back yard. That, and we got a grand-dog. So we built a fence to keep them out and in, respectively.

Living next door to a popular bed & breakfast inn, we occasionally get people knocking on our front door, suitcases in hand, eagerly looking to check in. "Sorry, wrong house. You want the place next door. The yellow one. The one with the big sign that says 'Bed & Breakfast Inn' and 'Vacancy' right in the front yard." It gets old after a while.

One person even argued with me. "You should have a sign that says, 'private residence'" she huffed.

"First of all, I do. You walked right past it on your way here. Secondly, why should I? Do you have a sign on your house that says, 'this is not my neighbor's house?'"

Over the winter we installed a pair of security cameras to oversee the backyard and promptly caught a handful of confused tourists. It was the same scene every time: They'd confidently walk up our front or back steps; they'd get about halfway into the yard; then they'd stop, look around; realize they were in the wrong place ("this place is a dump!"), and then sheepishly creep out the way they came.

But of course, the cameras don't actually prevent anyone from walking around our house. They only provide entertainment when they do. So we tried discrete signs. That didn't work either because, as we all know, people don't read signs.

So we built the fence. At first, we wanted a white picket fence. Then we considered black wrought iron, which would look a bit more formal and also be more "period correct." We talked to a few companies that make wrought-iron fencing in the right style, but they're expensive! New car expensive. Major vacation expensive. So that idea was off the table.

Instead, we built our own fence out of redwood. We dug the post holes (easy in sandy soil), set the posts, and built the rails, stiles, and panels all from scratch. The only thing we bought were the little round balls that sit atop the fence posts. I would've had to buy a lathe to make them (not that there's anything wrong with that), so buying premade ones seemed a lot easier. We routed some grooves in the posts and rails to add a little bit of style. We made a matching gate, too, and put a little latch on it.

Voila! New fence. And it's dog-tested, so mission accomplished there. However, we didn't lock the new gate, so just a few days ago we got another pair of hopeful B&B guests traipsing up the steps, through the new gate, and into the backyard before they turned around the realized their mistake. So now the gate is locked. Stupid tourists.

Tuesday, April 22, 2014

Dove Story


It's springtime. Time when a young bird's thoughts turn to... other birds.

We had a pair of doves (okay,  pigeons) build a nest on our upstairs balcony. This is a first. As far as well can tell, birds have never nested there before. Our first tip-off was all the, uh, guano on our front porch. Looking up, we saw a pair of birds perched on the upstairs railing. Day after day, there they were.

They accumulated sticks and started building a nest on the balcony. They were right outside an upstairs window, so it was easy to watch them and follow their progress. It seemed like a messy, haphazard nest, but what do we know? Maybe it was their first time.

After awhile, one of the birds -- the female? -- seemed to get fatter. And then she wasn't again. And, lo, there was a tiny little white egg on our porch!

We kept our distance from the window to avoid disturbing our two lovebirds. We could hear them cooing outside the window, and they'd sometimes fly away for an hour or two, probably to find something to eat.

Then the egg wasn't there. The nest was all disturbed, and the birds were gone. It couldn't have hatched after only one or two days, could it? But what else could have happened?

I think we kind of hoped that maybe the birds had just upgraded to a condo across town with better schools, but the reality seemed much grimmer. Lots of other birds are carnivorous, and they need to eat, too.

Tho' Nature, red in tooth and claw
With ravine, shriek'd against his creed...
I stretch lame hands of faith, and grope,
And gather dust and chaff, and call
To what I feel is lord of all,
And faintly trust the larger hope.  -- Tennyson
 

Wednesday, February 26, 2014

Hanging's Too Good For 'Em!


It was bound to happen eventually. Kathy stripped all the old wallpaper from the ground-floor dining room almost two years ago. Since that time, the walls have been bare. Last weekend, we finally got around to hanging the new wallpaper. 'Bout time.

Here you can see some before-and-after work. The new wallpaper is on the right, with the still-bare wall on the left. The funny-looking horizontal stripe above the door is where the picture rail used to go. We took those down before painting and papering. They'll go back up this week, after a little touch-up.

The little wooden panel halfway up the wall in the corner is the door to the dumbwaiter. If you open that up, you'll be looking into the dumbwaiter shaft and the back of the brick chimney. The shaft now has a modern heating duct in it, bringing blessed heat to the second floor.

The job took most of two days, which is about average for us. Hanging wallpaper isn't really all that hard, but if you've never done it, it's trickier than it looks. For one, you've got to match the pattern, so each sheet has to be aligned with its neighbor and then trimmed at the top and bottom. That wastes a lot of paper and doubles the amount of cutting you have to do.

Then you've got to work around obstacles, like doors and window frames. Again, simple in concept but tricky in practice. What do you do when one sheet of wallpaper comes really close to the door but doesn't quite reach? Cut a really thin strip? The walls are never flat and the corners aren't 90 degrees. Plus, with 10-foot ceilings, wet strips of wallpaper are long, heavy, and awkward. Keeping them straight and plumb when they keep trying to stick to the walls is another nuisance. Whine, whine, whine.

Now that we're done, though, we're quite happy with it. That should be the last of our wallpaper projects, too. No more after this. Time to start on outside chores.

Wednesday, February 19, 2014

Here's Lunch


This place just pays for itself, I swear.

Every few weeks we take a load of stuff to the dump. Sometimes it's broken-up concrete; sometimes it's plaster or drywall; sometimes it's metal pieces that we can recycle. This was a recycling trip.

As part of the old furnace removal-and-demolition project, we found ourselves with a big ol' pile of rusty furnace just waiting to be turned in for cash. After we heaved it into the back of the truck, we looked around for any loose pieces we might have accumulated over the weeks that also need to go out. This time, that included all the goodies you see here. We've got some galvanized water pipe... the manifold from the old furnace... some heavy cast-iron vent pipe... and this old drain pipe with the bell fitting on one end.

You can see how this pipe is all cracked and broken, held together by its own rust. We got about $24 for this load, which was enough to buy ourselves lunch. I even ordered the large fries with mine. Life is good.


Mommy... I Stained the Bathroom Floor!


We're about done with the ladies' room downstairs, so it was time to start on the gents'.

It's quite a bit smaller -- about the size of a generous phone booth -- but even more work. We're not sure what this room was originally, but it wasn't a bathroom. It appears to have been a "butler's pantry" or some sort of anteroom or pass-through between the dining room and the kitchen. For such a small room, it had two large doors in it, and not much else. At any rate, it's been the men's room for the last several decades.

The work started with the floor. When we stripped away the kitchen's old vinyl flooring and underlayment, we discovered an old oak floor in here, but nowhere else. Rather than tear it out, we saved it. I know, I know... wooden flooring in a public restroom seems like a terrible idea. And it probably is, but we're sticking with it anyway.

The oak was in bad shape, buried under layers of glue and nails. But we stripped off the adhesive residue, patched the holes, and sanded the bejeesus out of it until it was comparatively smooth. Then we rubbed in a coat of stain (left over from the 2010 floor project) and applied several layers of clear polyurethane. My hope is that the clear poly will waterproof the floor enough to keep it relatively sanitary.

The stain soaked in very unevenly, which I attribute to the aged and damaged condition of the wood, not my incompetence. We've agreed that it lends a charming, rustic look to the floor. Hey, it's a bathroom, not a ballroom, and I doubt many visitors to this space will comment on it.

We added a bead board wainscot around the walls, which Kathy painted gloss black. It looks really good, and pretty soon we'll add the floor molding and top molding, and probably a picture rail and some crown molding up high. The room is nearly twice as high as it is wide (10' x 6' x 3'), so we're trying to break up the vertical space to make it seem less like an upended shoebox.

Plumbing fixtures have arrived, and those go in once the floor has completely dried. Probably tomorrow.

Tuesday, January 28, 2014

A Century of Heat


This has certainly been a long time coming. After something like 120 years, there's finally heat on the second floor.

The house didn't originally have forced-air heat, of course. In fact, I'm not entirely sure how they did heat the place, because no remnants of the old heating system remain. We might have found part of an old boiler exhaust back in 2010, but I'm not even sure about that.

Much later on, someone installed a furnace under the crawlspace and added four forced-air heating ducts on the ground floor. That made the downstairs nice and toasty (when it worked), but left the 2nd and 3rd floors with no heat at all. That's how it was when we moved in.

Upstairs, we have this antique coal stove in the 2nd-floor dining room. It's a "Moore's Air Tight Heater" and weighs a metric ton. It's been heavily used, although I have a hard time imaging how you'd operate a coal stove in the middle of a house. Anyway, it got converted from coal- to gas-burning sometime around the 1930s or 1960s. We've tried to have it re-lit and put back into service, but none of the local furnace experts will touch it. It's not vented properly, it's not far enough from the wall, it's not safe, blah, blah, blah. The guy from the utility company refused to even light the pilot, but said I could do it myself if I waited until he got back in his truck and drove a block away. We finally got the message.

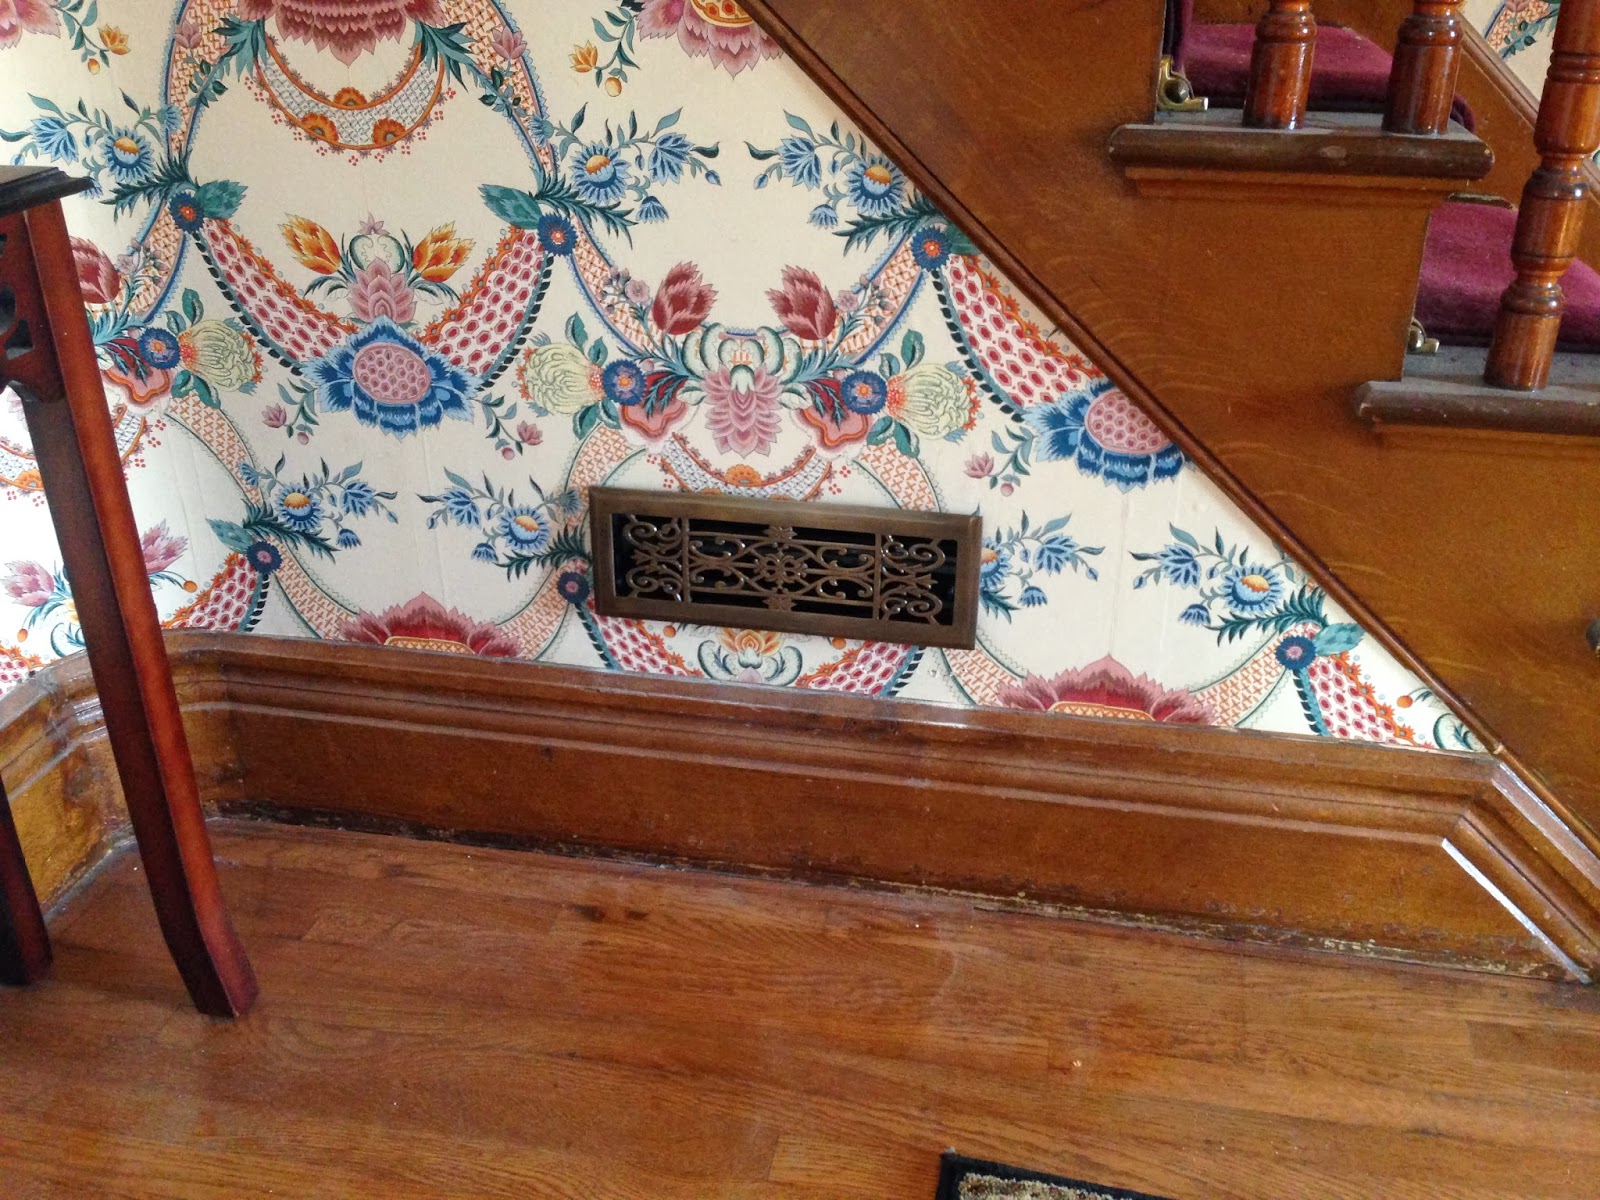
So how do we get heat upstairs? Turns out, there's an unused dumbwaiter shaft between the first and second floors. (It doesn't go up to the third floor, alas.) It's plenty wide enough for an 8-inch insulated duct, so we routed a new line up from the furnace to the second floor, added a wye, and brought out two new heat registers. One's in the 2nd-floor dining room, right near the defunct stove. The other is under the stairs to the third floor. Ah, heat. After the first day we could already tell the difference.

Getting it in was trickier than we planned, however. The dumbwaiter shaft takes care of the vertical run, but how do we get the heat out to the other rooms? The trick was to pass through Dr. Hart's Mystery Closet(TM). The closet is under the stairs, but only under the tallest part. The shorter part of the stairs is sealed off, wasted space. So I cut through the plaster and lath on that side, opening up access to the big triangular area under the stairs. From there, I could cut a 4x14" hole for the heat register.

I know I've droned on about this before, but it still surprises me every time I see it. The wooden supports under the stairs are all knot-free virgin redwood. Even the stringers, which are typically made from scrap, or at least cheap wood, are as thick as my leg and completely free of blemishes. The buried stair risers look furniture-grade. Geez, these guys sure knew how to waste good wood.

Anyway, once we'd gotten access to this space, it was easy to route the new heating duct. Now we've got a big silver snake coiled up at the bottom of the closet. Kathy will lose some of her storage, but we figure it's a good tradeoff.

A bit of history: The furnace we have now is at least the third generation of forced-air units to be installed in this house, not counting whatever they used in the 1800s and early 1900s. We installed a new furnace almost the very day we moved in, because the existing one was "putting out more carbon monoxide than heat," according to one inspector. But the one before that was still lurking under the house, taking up space. For some reason, nobody had hauled it out. I've been doing laps around it every time I go down into the crawlspace.

I say, "for some reason," but I know exactly why it was never removed. It's too big. Like the story of the man who builds a boat in his garage, only to find it won't fit through the door, the previous-previous furnace was bigger than the hatch into the crawlspace.

I measured the furnace and came up with something like 28" across its widest point. Then I measured the hatch: 27-3/4 inches. Really? You're that close and you're not going to fit? There's no way to widen the door, either, because it's between two studs. Which means it's never been any wider than it is now. So how'd they get it in?

We think they cut a hole in the floor and dropped the furnace straight down. As far as getting it out, that wasn't an option. But with only a quarter-inch difference, there must be some way to force it...

Kathy came outside with a concerned look on her face. "I heard a lot of banging. Are you okay?" A sledgehammer and tin snips made short work of our old furnace. What I couldn't cut off I battered with the hammer, and whatever didn't respond to battering got cut off. Eventually I "reduced" the dimensions of the furnace to 27-3/4 inches. You wouldn't want to install your shiny new one that way, but as far as removing a rusty old one, I was okay with it.

Friday, January 17, 2014

RIP, Mrs. Bergerac


The first restaurant to move into Dr. Hart's house was Maison Bergerac, and by all accounts, it was fantastic. Raymond and Betty Bergerac were French, and they'd moved to southern California in the 1960s before moving north to Pacific Grove and opening their restaurant here.

Bergerac's was the kind of place you went on special occasions. The food was outstanding and the waiting list was months long. They opened the reservation book for one day each year, and immediately sold out the entire season. It was that popular. Every winter, the Bergeracs went back to France to visit family, tour their favorite restaurants, and try new recipes. Their four children helped in the kitchen and, when they were old enough, waited tables.

The Bergeracs retired after about a dozen years and turned the restaurant over to new owners. The kids grew up, married, and started their own families in the area. I'm sure a few of them drive by here, their childhood home, every few days. Raymond died a few years ago, and the bench out front of the house is dedicated to him. Last year, Betty Bergerac died, and her name has been added to the bench, right next to Raymond's.

Her obituary appeared in the paper just as we were closing up the wall in the restaurant kitchen. We decided she'd be happy hidden away here, in the kitchen where she did so much to build its reputation, amid all the new clutter and bustle.

You are my sunshine, my only sunshine.
You make me happy when skies are grey.
You'll never know, Mama, how much we love you...


That Olde Tyme Look


The steady march of progress is robbing this kitchen of some of its original charm. Don't get me wrong: the room is far more sanitary than it ever was. It's an improvement, to be sure. But there's a real contrast between how this room was originally finished and how it looks now.

Take the walls. This room was originally finished in nice bead board below the chair rail, with plaster above. The redwood tongue-and-groove bead boards are all around the lower half of the kitchen. The redwood was stained originally, but got painted over later. Oddly, we've found a mix of green and yellow boards on the same wall, and some are more faded than others.

I had briefly (very briefly) thought we might restore the bead board in the kitchen, but after taking a closer look we quickly abandoned that idea. It would never pass the health inspection, but even if it did... nah. It's too far gone.

The first restaurant that went in here in the 1970s covered the room in a mixture of stainless steel and aluminum. The stainless held up pretty well, but the aluminum sheeting corroded and was pretty nasty. When we removed the old kitchen sink we also tore off the aluminum behind it, and uncovered all of this bead board. That also gave us the opportunity to replace the old plumbing and re-wire the electrical outlets on this wall. See that ungrounded outlet near where the sink used to be? Yikes.

After all the behind-the-wall work was done, the next step was to mount "green board" over the top of the bead board and plaster. That's water-resistant drywall, and lays the foundation for the new stainless. We had a local stainless guy come in and take measurements. Then he scurried away to get the materials and came back at the end of December to install it. Installation took maybe an hour, with another day to let the adhesive set.

Now the "wet wall" is all shiny and neat and up to code. Once we get the sink installed it'll actually be functional, too. We've got new PEX plumbing in the wall, new shutoff valves, and a new GFCI outlet. (Electrical note: the entire metal wall is now grounded.) It may not look quite as charming as the old redwood bead board (at least, back when that was new), but it's a lot safer for cooking and a lot easier to clean.